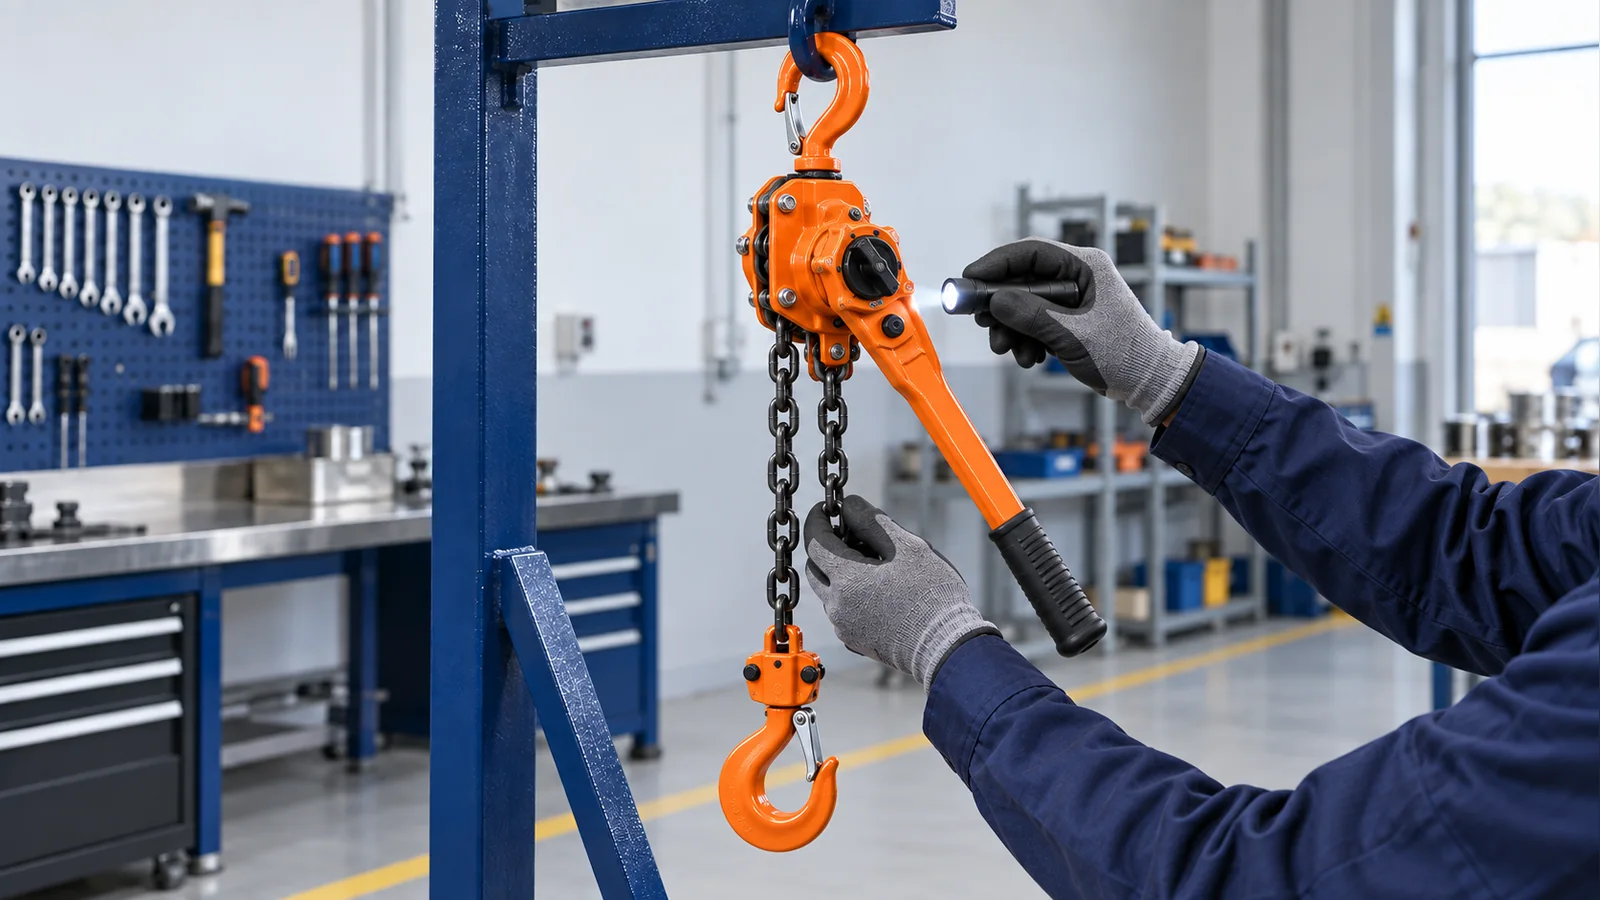
Lever Hoist Inspection Checklist: Load Chain, Hooks, Brake, Selector and Pre-Use Checks
A lever hoist can look serviceable while a damaged load chain, opened hook, worn selector mechanism or unreliable brake is developing inside the load path. A useful inspection therefore does more than look for rust. It confirms the identity of the exact hoist, follows the load-bearing components from the upper hook to the lower hook, checks the operating controls and separates an operator’s pre-use check from a detailed periodic inspection.
This guide focuses on chain-type lever hoists, also called lever blocks or ratchet lever hoists. It supports users of KKV HSH-VA, HSH-VL and other chain lever-hoist models, but it does not replace the manual and discard criteria supplied for the exact model, capacity and serial number.
Inspection must be performed by people whose training and authority match the level of inspection. An operator can identify obvious defects and verify permitted functions before use. Measurement, disassembly, internal brake evaluation, repair, proof testing and return-to-service decisions may require a designated, competent or qualified person under the applicable system.
Quick answer: Before using a lever hoist, verify its readable identity and rated capacity; inspect the body, handle, selector, fasteners, upper and lower hooks, latches, load chain, chain end arrangement and suspension points; and perform only the unloaded and initial load-taking functional checks required by the exact manufacturer. Stop and quarantine the hoist if the brake slips, the load creeps, the chain jumps or binds, the selector or free-chain mechanism behaves abnormally, a hook or chain is damaged, parts are loose or missing, the hoist may have been overloaded, or its condition is uncertain.
Table of contents
- Understand What This Checklist Covers
- Separate Pre-Use, Frequent and Periodic Inspection
- Prepare the Hoist and Inspection Area
- Verify Identification, Capacity and Service History
- Inspect the Hooks, Latches and Suspension Points
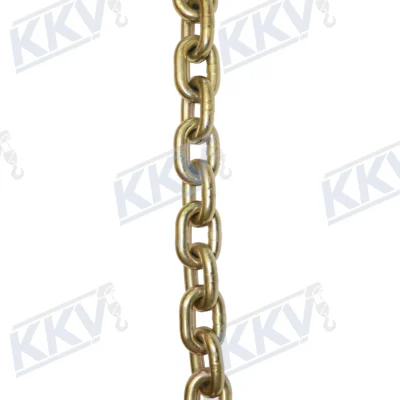
- Inspect the Load Chain and Chain Path
- Inspect the Body, Handle, Selector and Free-Chaining System
- Check the Brake and Operating Functions
- Use the Step-by-Step Pre-Use Checklist
- Plan Periodic Inspection and Records
- Remove, Quarantine and Repair Correctly
- Frequently Asked Questions
- Technical Reference Note
1. Understand What This Checklist Covers
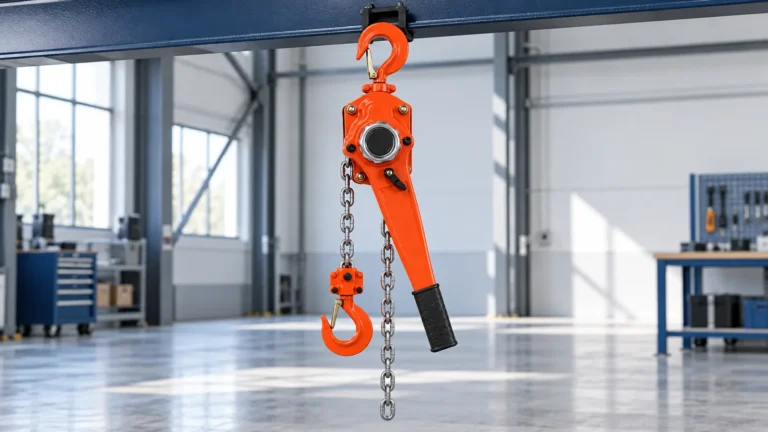
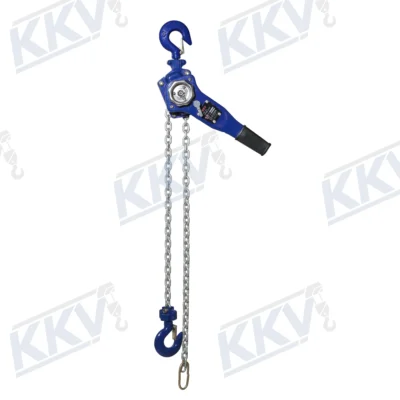
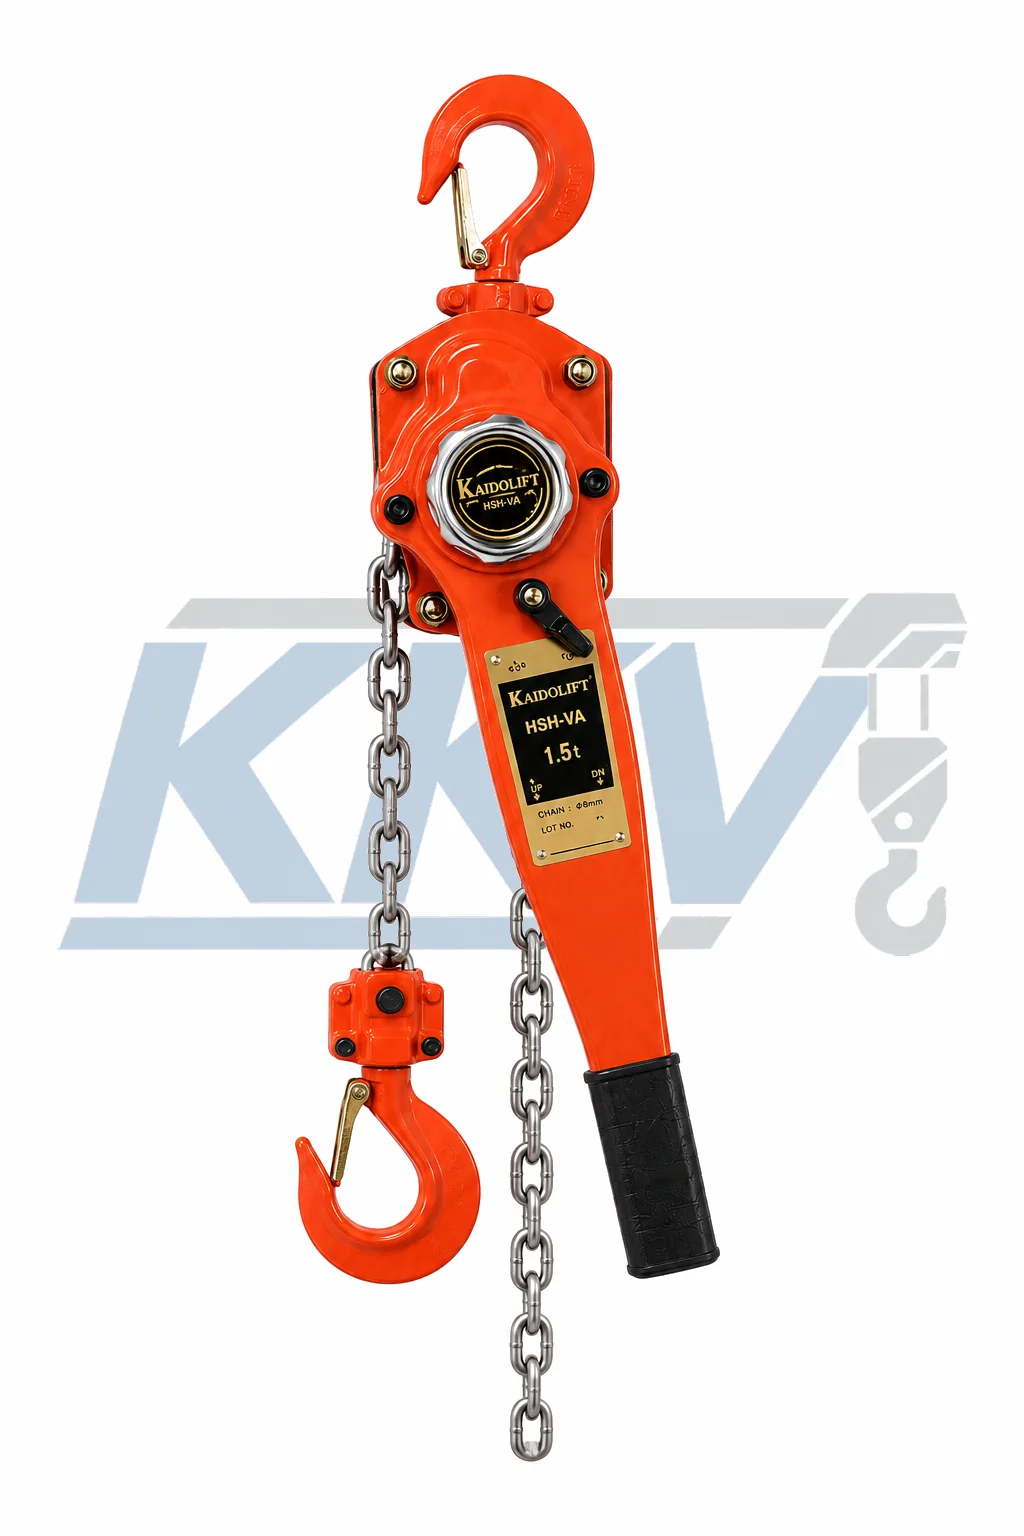
A chain lever hoist moves load chain through a manually operated ratchet lever, gearing, load sheave and load-controlling brake. Depending on the exact design, the operator selects lifting, lowering or neutral/free-chain mode and strokes the handle to move the load. That operating arrangement creates inspection points that do not exist on a conventional hand-chain block: the lever, grip, direction selector, selector pawl and any free-chain knob or clutch.
This article covers the complete external load path and the functional observations an operator or inspector may need to make:
| Inspection area | What the check is intended to establish | Important boundary |
|---|---|---|
| Identification and history | The exact hoist, capacity, manual and inspection status are known | Do not infer capacity from body size, color or chain diameter |
| Upper hook and suspension | The supporting connection and hook can transmit the intended force | The support structure and rigging require their own verification |
| Body, gearing enclosure and fasteners | There is no obvious impact damage, opening, looseness or missing hardware | Internal condition cannot be accepted from an external look alone |
| Lever, grip and selector | Controls are secure, move as designed and select the intended direction | A stiff, loose or unreliable control is not corrected by extra force |
| Brake and ratchet mechanism | The hoist takes, holds and releases load in the controlled manner specified by the manual | Operators should not dismantle or adjust the brake |
| Load chain and sheave path | The calibrated chain is correctly reeved, lubricated as required and free from rejectable damage | Sling chain is not an interchangeable replacement hoist chain |
| Lower hook and connection | The hook, latch, swivel or yoke and chain connection remain serviceable | A latch retains slack rigging; it is not a load-bearing support |
The current ASME B30.21 scope covers construction, operation, inspection and maintenance of applicable ratchet-and-pawl and friction-brake lever hoists used for lifting, pulling and tensioning. The scope also makes clear that special-purpose uses require separate consideration. A standards scope page is useful context, but it is not a substitute for the purchased standard, local law or product manual.
Do not apply this checklist unchanged to wire-rope pullers, web-strap lever hoists, cargo binders, vehicle-recovery devices, personnel hoists or powered hoists. Their load-bearing media, controls, applications and rejection criteria differ.
2. Separate Pre-Use, Frequent and Periodic Inspection
One checklist cannot give every inspection the same depth. A practical program defines at least three levels and identifies who can perform each one.
Pre-use or daily check. The operator checks identity, visible condition, chain routing, hooks, controls and basic function before the hoist is used. This check is intended to catch conditions that make the next operation unsafe. It does not authorize disassembly or repair.
Frequent inspection. A designated person performs a broader external and functional check at intervals based on service severity and manufacturer requirements. It can include more detailed measurements and a controlled functional check. The exact interval is not universal.
Periodic or thorough inspection. A competent or otherwise authorized person performs a detailed examination of safety-critical components, measurements, internal parts where required, records and disposition. The scope can include the brake, ratchet, pawls, gears, sheave, pins, springs, frame and chain guides after controlled disassembly by qualified personnel.
The Kito L5 lever-hoist manual illustrates why intervals must be tied to the specific equipment and service classification: it separates daily, frequent and periodic inspections and changes intervals for normal, heavy and severe service. Those intervals belong to that manual and must not be copied automatically to another make or model.
In Great Britain, HSE guidance on thorough examination distinguishes simple pre-use checks from detailed examinations by a competent person and explains that examination frequency can be controlled by legislation or a competent-person examination scheme. Other countries and projects use different terminology and periods.
Inspection should also be triggered by events, not only dates. Quarantine the hoist after a suspected overload, shock load, dropped or uncontrolled load, impact, fall, severe side loading, weld spatter, chemical exposure, unusual heat, water ingress, prolonged storage, unauthorized repair or any incident that could have affected a safety-critical component.
3. Prepare the Hoist and Inspection Area
Inspect the hoist without a suspended load in a clean, well-lit area. Land and secure any load first. Prevent another person from taking the unit while inspection is in progress by using the workplace’s approved isolation and quarantine method.
Have the following information available:
- the exact manufacturer, model, rated capacity and serial or traceability number;
- the operating manual and capacity-specific inspection criteria;
- the previous inspection report and any open observations;
- service history, including unusual events and environmental exposure;
- suitable cleaning materials and lubricant permitted by the manufacturer;
- calibrated measuring tools when measurements are within the inspector’s authority;
- an approved defect tag, quarantine area or lockout method.
Remove only loose dirt by an approved method. Do not grind, polish, paint or aggressively wire-brush a component to make it look acceptable. Such work can remove evidence, damage protective finishes or conceal cracks and wear. If contamination prevents inspection and cannot be removed safely under the approved procedure, quarantine the hoist.
Lay out the load chain in a relaxed condition where its full length can be viewed and handled without creating trip or pinch hazards. For multi-fall models, confirm the lower hook block has not been passed through the chain and capsized. Never attempt to inspect, clean or untwist the chain while it is carrying a load.
4. Verify Identification, Capacity and Service History
Begin with identity. Confirm that the nameplate and warning labels are attached and readable. Match the model, rated capacity, lift, serial number and other traceability information to the register and manual. If the unit cannot be positively identified, do not estimate its capacity from a similar-looking hoist.
Check the inspection tag or record without treating it as proof of present condition. A valid periodic inspection does not clear damage that occurred afterward. Compare the current location and application with the approved equipment record: a hoist moved from a dry workshop to a corrosive, outdoor or high-temperature environment may require a different inspection and maintenance plan.
Ask the operator or custodian whether the hoist has experienced:
- a load of unknown weight or a suspected overload;
- an abrupt stop, snag, shock load or unexpected load movement;
- unusually high handle force or a handle extension;
- brake slip, load creep, chain jump, binding or abnormal noise;
- a drop, vehicle impact or crushed housing;
- rain, immersion, salt, chemicals, abrasive dust or welding exposure;
- dismantling, replacement parts or repair without documented authorization;
- a long period out of service or storage with the brake engaged.
Any uncertain event should be recorded and referred for the level of inspection required by the manufacturer and applicable system. Do not erase history by giving the hoist a quick external clean and returning it to the rack.
5. Inspect the Hooks, Latches and Suspension Points
Inspect the upper and lower hooks systematically. Clean the bearing areas enough to see their condition, then compare them with the manufacturer’s drawing, initial measurements and discard criteria.
Look for:
- cracks, nicks, gouges, sharp wear steps or heat and weld damage;
- visible opening, twist, bend or other permanent deformation;
- wear in the saddle, throat, tip, shank, pin, yoke or swivel connection;
- corrosion, pitting or loss of section;
- damaged, missing, stiff or incorrectly closing latch components;
- loose or missing nuts, pins, retainers, rivets or fasteners;
- a swivel or hook block that is seized, rough or abnormally loose;
- evidence that load has been carried on the hook tip or latch;
- unauthorized welding, heating, grinding or repair marks.
Measure hook opening, twist and section only by the method and reference dimensions for the exact hoist. Some manufacturers require measurements taken when the hook is new to become the baseline. A generic percentage found online must not replace the supplied criteria.
The latch is a retaining device for slack rigging. It does not increase hook capacity and must not support the load. Rigging should seat in the hook bowl without crowding, point loading or side loading. If the intended connection does not fit the hook correctly, change the approved rigging arrangement rather than forcing it past the latch.
Inspect the upper suspension point, shackle, clamp, sling or engineered anchor separately. A sound hoist is still unsafe on an unsuitable support. The supporting structure must be verified for the maximum force and actual direction of loading.
6. Inspect the Load Chain and Chain Path
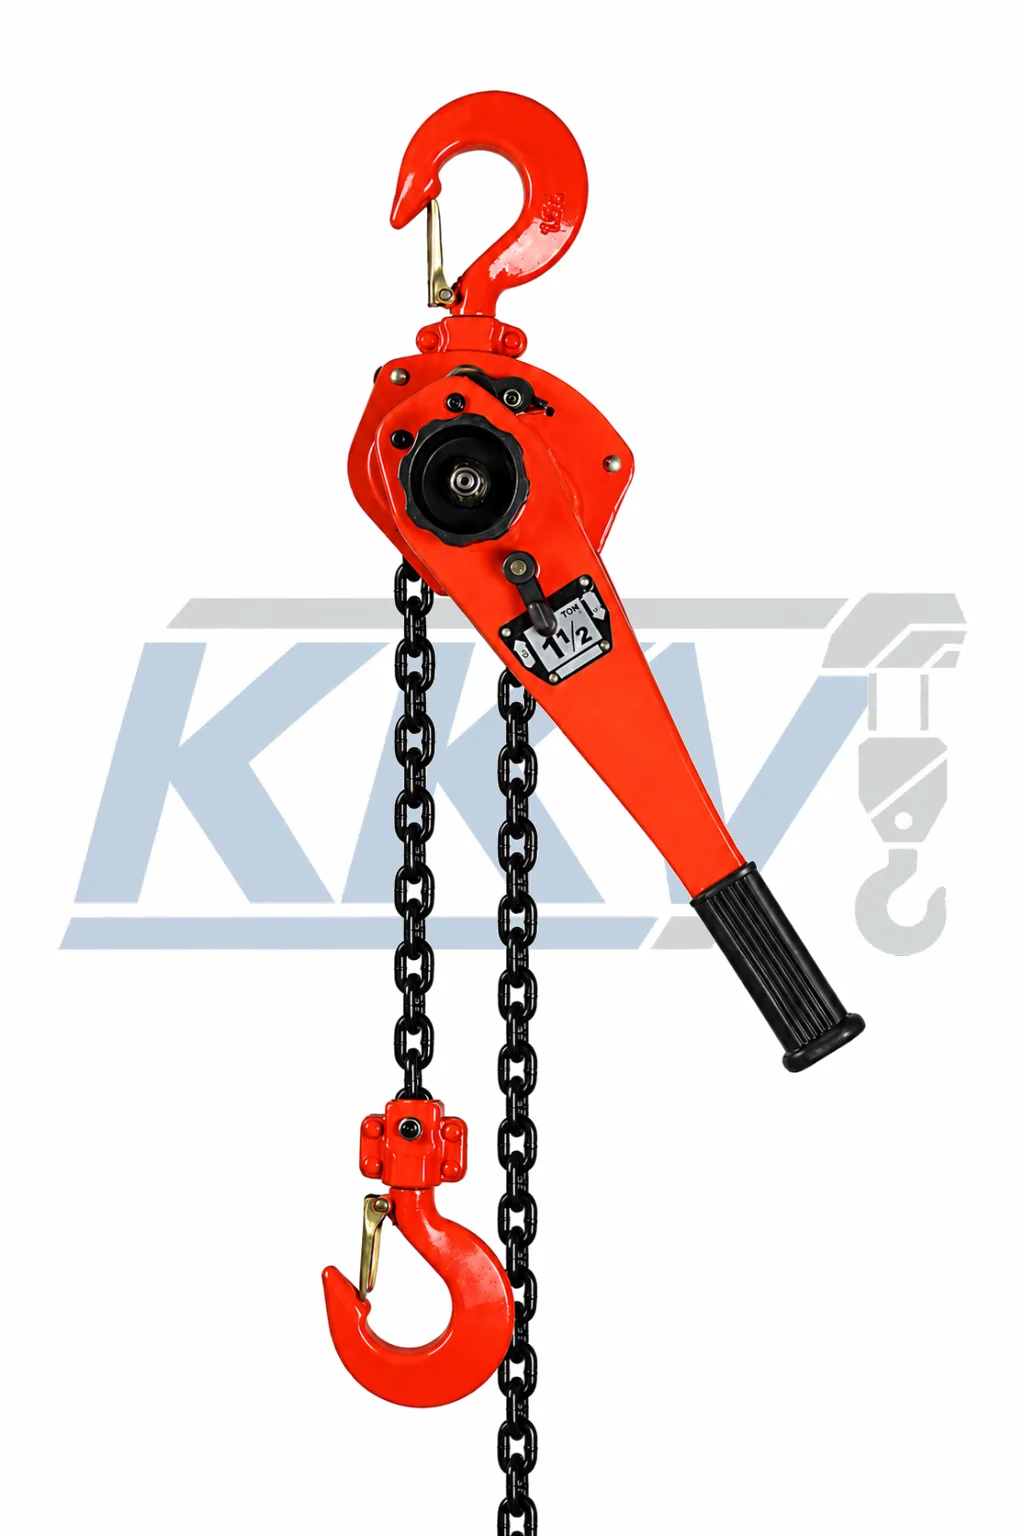
Lever-hoist load chain is calibrated to the pocket geometry of the exact load sheave. Inspect the complete chain, not only the section normally visible below the body.
- Confirm correct reeving. Check that every chain fall is untwisted, the weld orientation and routing match the manual, and the chain enters the body and lower block correctly.
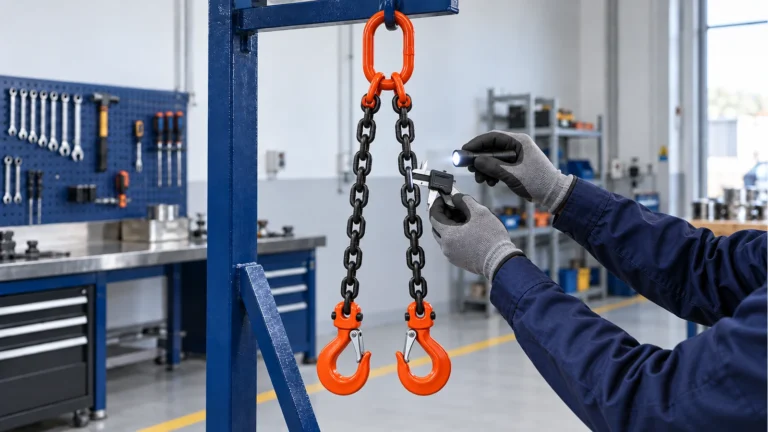
- Inspect link by link. Look for cracks, gouges, nicks, dents, bent links, twist, stretch, corrosion, pitting, abrasion, flattened bearing surfaces, heat discoloration and weld spatter.
- Check articulation. Each unloaded link should articulate through its neighbors without sticking from deformation, corrosion, paint or debris.
- Check lubrication. Confirm the chain is clean and lubricated by the method and product specified by the manufacturer. Excess dirt stuck to heavy lubricant can accelerate wear.
- Inspect chain contact components. When wear or jumping is found, the authorized inspector should also evaluate the load sheave, chain guide, stripper, idle sheave and chain connections.
- Check the no-load end. Confirm the chain stopper, end link or specified restraint is present and undamaged. It is not a routine travel limit and must never be relied on to stop an operating stroke.
| Finding | Why it matters | Safe action |
|---|---|---|
| Twisted, kinked or incorrectly reeved chain | Chain may not seat in the load sheave and can jump, bind or damage guides | Stop; unload and correct only by the approved method, then inspect for resulting damage |
| Crack, gouge, deep nick, bend or weld spatter | A load-bearing link may have lost section or fatigue resistance | Remove from service and refer for authorized replacement |
| Stretch, pitch increase or diameter loss | Chain may no longer match the sheave or retain its required strength | Measure using the exact manual’s link count, locations and discard values |
| Severe rust, pitting or stiff articulation | Corrosion can remove material and hide cracks | Quarantine for qualified evaluation; cleaning alone does not restore lost section |
| Chain jumping, binding or abnormal noise | Chain, sheave, guide or internal alignment may be damaged | Stop the functional check and remove the hoist from service |
| Unknown or substituted chain | Correct material, heat treatment, pitch and traceability cannot be confirmed | Do not use; obtain the approved replacement chain for that model |
Do not weld, heat, grind, splice or add links to a hoist load chain. Do not replace it with ordinary Grade 80 sling chain even when the diameter looks the same. The lifting chain versus hoist load chain guide explains the different functions. Replacement must follow the manufacturer’s specified chain, installation method, inspection and testing requirements.
7. Inspect the Body, Handle, Selector and Free-Chaining System
Examine the housing, covers, frame and gear case for dents, cracks, spreading, heavy corrosion, opened seams, missing covers and signs of impact. Check all visible nuts, bolts, rivets, split pins, retainers and screws. A fastener that repeatedly loosens can indicate damage or incorrect assembly; tightening it without investigation may hide the cause.
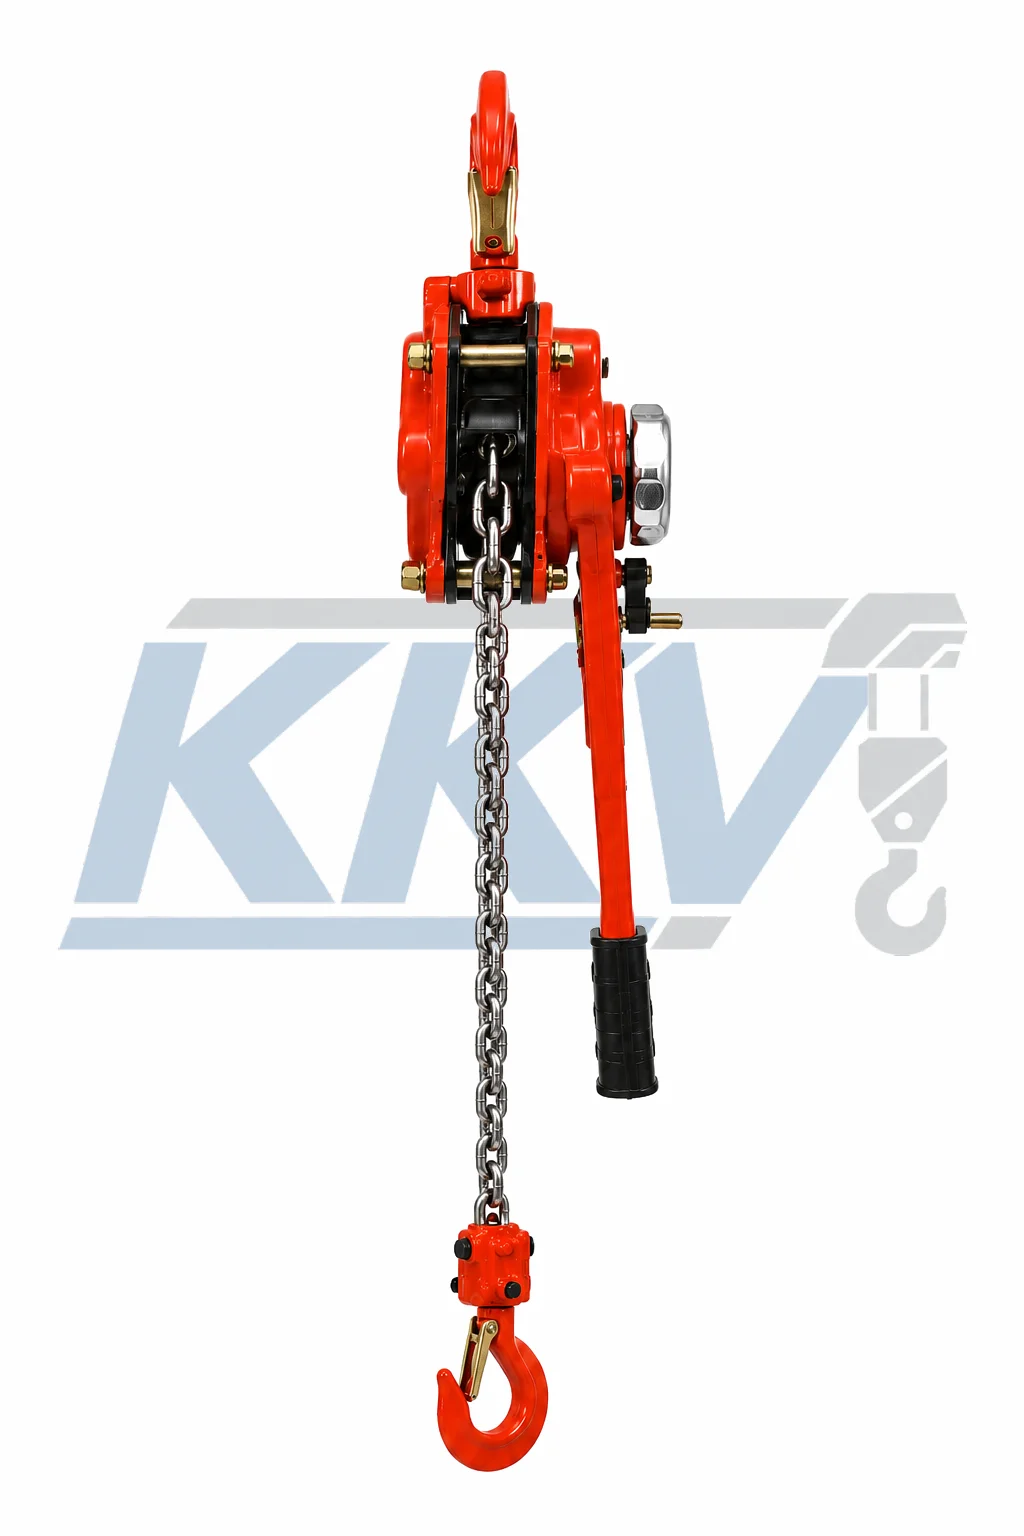
Inspect the full operating handle and grip. The lever should not be bent, cracked, cut, heavily corroded or loose at its connection. The grip should be secure and usable without sharp edges. Evidence of a pipe extension, hammering or powered operation is a reason for additional inspection because the mechanism may have been overloaded.
Move the direction selector only with the hoist unloaded and according to the manual. It should positively engage the permitted positions without excessive looseness, sticking or ambiguous movement. Markings for lifting and lowering must be understandable. Stop if the selector moves by itself, will not remain engaged, fails to produce the expected direction or requires abnormal force.
Free chaining allows rapid no-load adjustment on models designed with that function. It is not a load-release method.
- Confirm the exact model includes free chaining; some safety variants intentionally disable it.
- Operate it only while the hoist is completely unloaded and in the sequence stated by the manual.
- Check that the chain moves smoothly and the knob or control resets correctly.
- Never force neutral mode, pull the free-chain control under load or use it to lower a suspended object.
- If the mechanism does not engage, disengage or reset consistently, quarantine the hoist.
The Kito LB product information shows that even products within one lever-hoist family can have different freewheel arrangements. This is why a generic online sequence cannot safely replace the exact manual.
8. Check the Brake and Operating Functions
Functional checking should progress from unloaded operation to the limited initial load-taking check specified by the manufacturer and work procedure. Do not begin by suspending a full unknown load.
Unloaded Function Check
With the hoist unloaded and correctly supported, follow the exact manual to check lifting, lowering and, where fitted, free chaining. Confirm that the lever moves smoothly, the selector produces the expected direction, the chain travels without jump or bind and the normal ratchet sounds are consistent with the manufacturer’s description.
Do not diagnose a brake by sound alone. A click pattern can help identify abnormal operation, but it does not prove that friction surfaces, pawls and springs are within limits.
Initial Load-Taking Check
Connect the load with approved rigging, remove slack slowly and pause as soon as the system becomes taut. Recheck hook seating, latch position, chain alignment, anchors and stability. Perform only the short lift or movement and brake check prescribed by the exact manufacturer and site procedure. Keep the load close to its support and keep personnel clear.
Stop immediately if:
- the load creeps, drops or cannot be held;
- the handle moves without the expected chain movement;
- the chain jumps, binds, bunches or enters the body incorrectly;
- the selector changes position or fails to control the intended direction;
- the brake engages or releases unpredictably;
- operating effort is abnormally high or changes suddenly;
- there is grinding, irregular clicking, scraping or another abnormal sound;
- the body, hooks, chain, suspension or rigging moves out of alignment.
The official Yale PSB lever-hoist manual provides a model-specific example of testing the brake after slack is removed. Its stated travel and operating sequence belong to that product; use the KKV manual and approved procedure for the KKV model being inspected.
Never open, lubricate, clean or adjust internal brake friction parts as an operator’s field fix. Oil or contamination on a friction surface can change braking performance. Internal brake work, reassembly and post-repair testing require the specified parts, procedures and competence.
9. Use the Step-by-Step Pre-Use Checklist
The following field checklist is a decision aid. Add the exact model’s requirements and workplace controls before issuing it.
| Step | Check | Continue only when |
|---|---|---|
| 1 | Identity and status | Nameplate, WLL, model, warnings and inspection status are legible and match the register |
| 2 | Service history | No unresolved overload, impact, repair, exposure or abnormal-operation event is reported |
| 3 | Upper support | Hook, latch, suspension, rigging, anchor and structure are suitable and correctly connected |
| 4 | Hoist body | Housing, covers, fasteners, pins and retainers are present with no obvious damage or unauthorized alteration |
| 5 | Lever and selector | Handle and grip are secure; selector markings are clear; positions engage as the manual specifies |
| 6 | Free chaining | If fitted, it operates smoothly only under no load and resets correctly; otherwise it is not used |
| 7 | Load chain | Correct chain is clean enough to inspect, properly reeved, untwisted and free from rejectable damage |
| 8 | Lower hook | Hook, latch, swivel/yoke and chain connection are undamaged and rigging seats in the hook bowl |
| 9 | Unloaded function | Lifting and lowering actions are smooth and consistent with the manual, without jump, bind or abnormal sound |
| 10 | Initial load-taking | Slack is removed slowly; alignment remains correct; the prescribed brake check shows no slip or creep |
| 11 | Work area | Handle clearance, operator footing, visibility, exclusion zone and load path are controlled |
| 12 | Final decision | Every result is acceptable; any doubt has been quarantined instead of overridden |
Before operation, also verify that the exact hoist is approved for the intended lifting, pulling, positioning or tensioning direction. A pre-use inspection cannot turn an unsuitable application into an approved one. Use the lever-hoist selection guide when capacity, travel, handle clearance, load direction or anchors still need to be confirmed.
10. Plan Periodic Inspection and Records
A periodic inspection goes beyond the external pre-use checklist. Its written scope should identify the required competence, disassembly level, measurements, functional tests, acceptance criteria, record fields and person authorized to return the hoist to service.
Depending on the exact model and program, periodic work may include:
- measured hook opening, section, twist and wear against initial or manufacturer values;
- load-chain pitch over the specified number of links and diameter at the specified contact points;
- chain pin, hook yoke, swivel, idle sheave and connection wear;
- load sheave pockets, chain guides and stripper condition;
- lever, selector pawl, springs, gears, shafts and bearings;
- brake friction surfaces, ratchet disc, pawls, springs and threaded components;
- frame, gear case, stay bolts, holes, welds and fastening condition;
- correct reassembly, lubrication, no-load operation and required post-maintenance test.
Do not transfer discard dimensions between models. The Kito manual, for example, publishes capacity-specific chain, hook and internal-component values for its L5 series. Those numbers demonstrate the need for measurement, not a universal limit for KKV or another lever hoist.
An inspection record should be traceable to one hoist and include:
| Record field | Example entry format |
|---|---|
| Equipment identity | Manufacturer, model, capacity, serial/asset number |
| Location and owner | Workshop, project, department or customer |
| Inspection type | Pre-use observation / frequent / periodic / event-triggered |
| Date and examiner | Date, name, competence or authorization reference |
| Service classification | Normal / heavy / severe, using the governing definition |
| Findings | Component, location, observation and measurement with units |
| Criteria used | Exact manual revision, standard, examination scheme or procedure |
| Disposition | Continue / monitor under written limit / quarantine / remove / repair |
| Corrective action | Approved part, repairer, work order and completion date |
| Return to service | Authorized person, required test, result and release date |
| Next due action | Date or condition determined by the controlling program |
Keep inspection and repair records protected from unauthorized alteration. Trend repeated defects by model, location, operator task and environment. Repeated chain wear, hook opening or brake contamination may indicate an application, training, storage or maintenance problem rather than random component failure.
11. Remove, Quarantine and Repair Correctly
When a rejectable or doubtful condition is found, stop the check safely, land any test load, identify the hoist and prevent further use. A verbal warning or loose paper note is not enough if another worker can pick up the unit.
Use a controlled disposition process:
- Attach the approved out-of-service or quarantine identification.
- Record the asset number, defect, location, date and person reporting it.
- Move the hoist to the designated secure area when safe to do so.
- Send the record, photographs and relevant history to the authorized evaluator.
- Repair only under the manufacturer’s instructions using approved parts and competent personnel.
- Complete the specified inspection and test after repair or reassembly.
- Document authorization before the hoist returns to service.
Do not weld or heat a hook or chain, straighten a bent handle or hook, grind away a crack, re-stitch an identification plate, substitute springs or pawls, add a random chain link, lubricate brake friction surfaces or increase a selector’s engagement by improvised modification. Do not prove a questionable hoist by simply lifting a heavier load.
HSE notes that routine overload testing is not automatically required during every thorough examination and can itself damage equipment; any test should be selected from the applicable requirements and a competent assessment. The exact manufacturer controls post-repair testing for its product.
12. Frequently Asked Questions
How often should a lever hoist be inspected?
Inspect it before use and at the additional intervals required by the exact manufacturer, service severity, workplace program and applicable law. Heavy, severe or abnormal service usually requires closer attention. An incident, long storage period, overload or suspected damage can trigger inspection before the next scheduled date.
Who can inspect a lever hoist?
An appropriately trained operator can perform the defined pre-use check. Detailed measurements, disassembly, internal brake inspection, repair and return-to-service decisions require the designated, competent or qualified person defined by the manufacturer and applicable system.
Can I use a lever hoist if a hook latch is missing?
Do not assume so. A missing or damaged latch can allow slack rigging to escape and is a reportable defect. Follow the exact hook and hoist criteria and replace parts only with approved components. The latch must never carry the load.
How do I measure lever-hoist load-chain wear?
Use the link count, measurement locations, tools and discard values in the exact model’s manual. Manufacturers may measure pitch over several links and diameter at worn contact areas. Do not use a universal percentage or compare the chain only with a nominal catalog diameter.
Can Grade 80 sling chain replace lever-hoist load chain?
No. Hoist chain must match the load sheave’s pitch and pocket geometry and meet the manufacturer’s material, heat-treatment and dimensional requirements. Use only the specified replacement chain and authorized installation procedure.
When may the free-chain function be used?
Only when the hoist is completely unloaded, the exact model includes that function and the operator follows its manual. Never use free chaining to release or lower a supported or suspended load.
What should I do if the selector sticks or changes direction unexpectedly?
Stop operation, land the load safely if necessary and quarantine the hoist. Do not force the selector, strike it or continue by holding it in position. The control and internal selector mechanism require authorized evaluation.
How can I tell whether the brake is safe?
Follow the manufacturer’s unloaded and initial load-taking functional checks and periodic inspection requirements. No load slip or creep is acceptable during the prescribed check. External operation alone cannot verify the condition of every internal friction and ratchet component.
Can I lubricate the lever hoist during inspection?
Lubricate only the points, with the product and by the method stated in the exact manual. Load chain commonly requires lubrication, but internal brake friction surfaces must not be contaminated. Cleaning and lubrication cannot repair wear, stretch, cracks or lost section.
Can a damaged hook, chain or handle be straightened and reused?
Not as an improvised field repair. Heating, welding, bending or grinding can further damage heat-treated components and hide the original defect. Quarantine the hoist and use the manufacturer’s approved repair or replacement process.
Is a pre-use check the same as a periodic inspection?
No. A pre-use check looks for immediate visible and functional problems before operation. A periodic inspection is a deeper, documented examination that may require measurements, disassembly, internal evaluation and an authorized return-to-service decision.
13. Technical Reference Note
Useful first-party references for building a site-specific program include the ASME B30.21 lever-hoist scope, the Kito L5 owner/operator manual, the Yale PSB operating and maintenance manual, the OSHA Crane, Hoist and Monorail Alliance resource page and HSE guidance on thorough examinations.
These sources illustrate inspection principles and model-specific requirements. They do not make one manufacturer’s discard limits applicable to another product or make one country’s legal interval universal. The exact nameplate, current manual, inspection scheme, local law, application and competent-person decision remain controlling.
Build a Traceable Lever Hoist Inspection Process
A reliable process connects the correct hoist identity to the correct manual, defines what the operator checks before use, schedules competent periodic inspection according to service, and prevents a defective unit from returning to work without documented authorization.
KKV can help identify a suitable current lever-hoist model and provide product information for a quotation. Send the intended function, maximum load or line force, direction, required lift, attachment arrangement, operating frequency, environment, destination, required documents and quantity. For model selection, compare the HSH-VA lever hoist, HSH-VL lever hoist and the complete lever-hoist category.
For product selection or documentation support, contact KKV or email sales@kkvhoist.com with the application details and required quantity.
Safety note: This article is general inspection guidance, not a repair manual, proof-test procedure or authorization to use questionable equipment. Follow the exact manufacturer instructions, site risk assessment, applicable law and competent-person decisions. Never exceed rated capacity, use the load chain as a sling, side-load a hook, operate free chaining under load, lift people with a material lever hoist or allow anyone into a suspended-load or stored-energy release path.